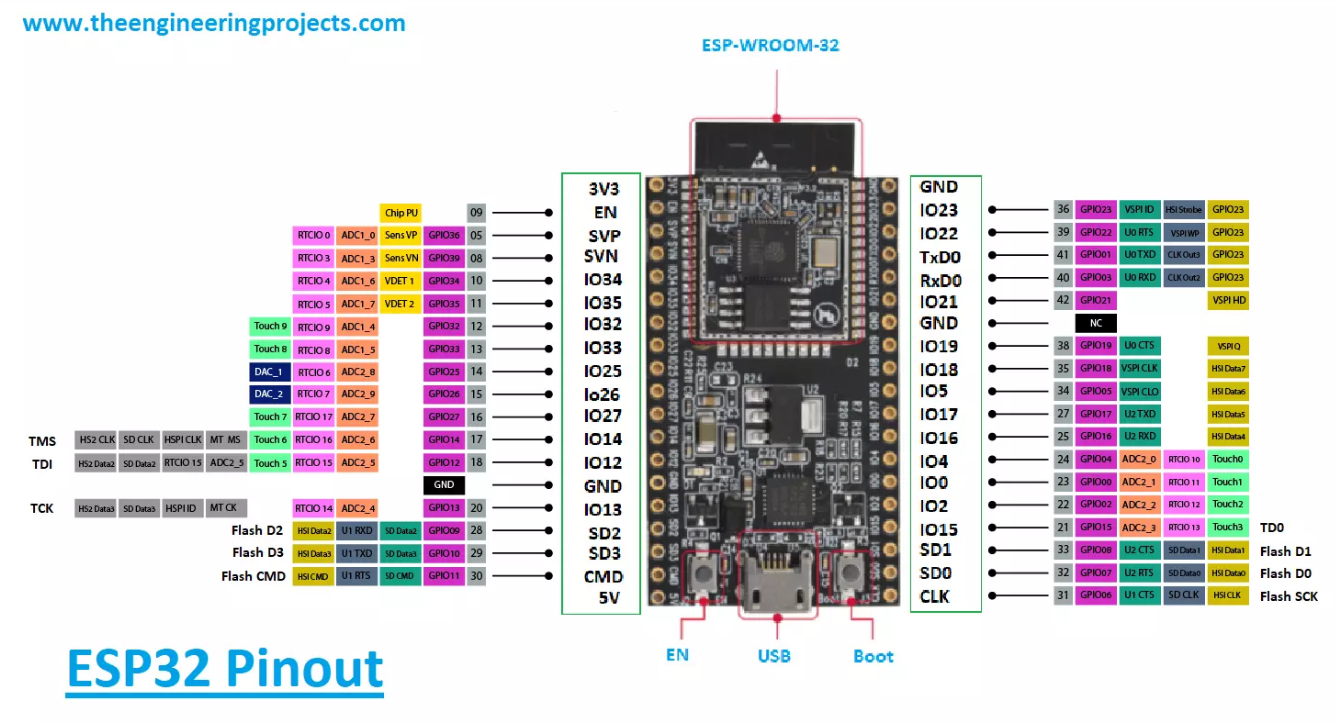
ESP-WROOM-32 핀아웃
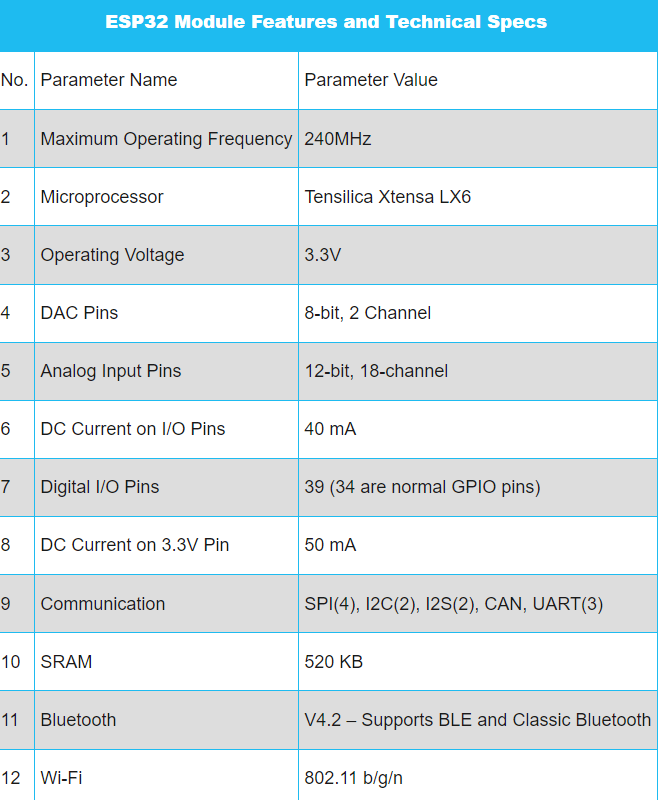
스펙
MPU6050은 원래 3.3V 사용하니까
3v3 핀을 vcc로 주면될듯
처음 쓰므로 대충 다음 링크 참고
[ESP32] ESP32 아두이노 IDE 에서 사용하기
본 절은 ESP32 를 사용하기 위해 알아야 할 내용과 실습 방법에 대해 설명한다. ESP32 특징, 동작원리, 사양, 연결 핀 배열, 출력 값, 주의사항을 알아본다. ESP32를 연결하고, 간단한 코딩으로 쉽게 실
makerspace.steamedu123.com
https://www.bneware.com/blogPost/esp32_arduino_ide
ESP32 아두이노 IDE 에서 사용하기
www.bneware.com

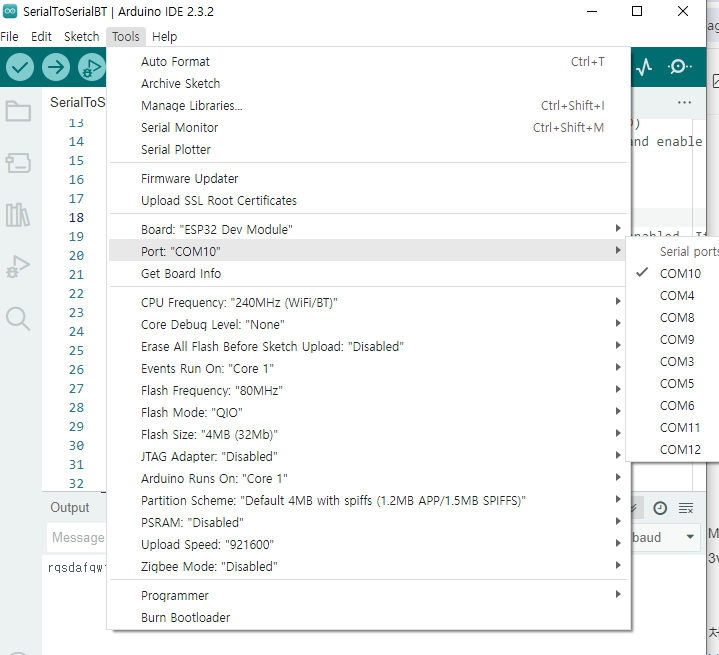
처음쓰면서 업로드 설정이 뭔가 복잡해보이는데
ESP32 Dev Module에 장치관리자에 나온 COM10포트 지정해줫더니
대충 올라가지긴한다.
간단하게
아래 링크참고해서 블루투스 예제 가져와서 사용해봄
https://m.blog.naver.com/heennavi1004/221799043375
[arduino] ESP32 Bluetooth 통신
[arduino] ESP32 Bluetooth 통신 20200206 ESP32와 arduino로 bluetooth 통신을 해본다. 예제의 Se...
blog.naver.com
업로드한 블루투스 예제
// This example code is in the Public Domain (or CC0 licensed, at your option.)
// By Evandro Copercini - 2018
//
// This example creates a bridge between Serial and Classical Bluetooth (SPP)
// and also demonstrate that SerialBT have the same functionalities of a normal Serial
// Note: Pairing is authenticated automatically by this device

#include "BluetoothSerial.h"

String device_name = "ESP32-BT-Slave";

// Check if Bluetooth is available
#if !defined(CONFIG_BT_ENABLED) || !defined(CONFIG_BLUEDROID_ENABLED)
  #error Bluetooth is not enabled! Please run `make menuconfig` to and enable it
#endif

// Check Serial Port Profile
#if !defined(CONFIG_BT_SPP_ENABLED)
  #error Serial Port Profile for Bluetooth is not available or not enabled. It is only available for the ESP32 chip.
#endif

BluetoothSerial SerialBT;

void setup() {
  Serial.begin(115200);
  SerialBT.begin(device_name); //Bluetooth device name
  //SerialBT.deleteAllBondedDevices(); // Uncomment this to delete paired devices; Must be called after begin
  Serial.printf("The device with name \"%s\" is started.\nNow you can pair it with Bluetooth!\n", device_name.c_str());
}

void loop() {
  if (Serial.available()) {
    SerialBT.write(Serial.read());
  }
  if (SerialBT.available()) {
    Serial.write(SerialBT.read());
  }
  delay(20);
}
hc-05랑 다르게 비번 설정없이 바로 BT로 연결가능
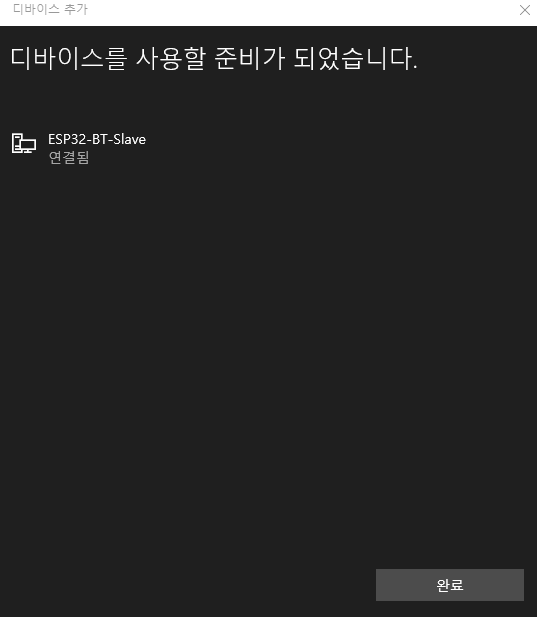
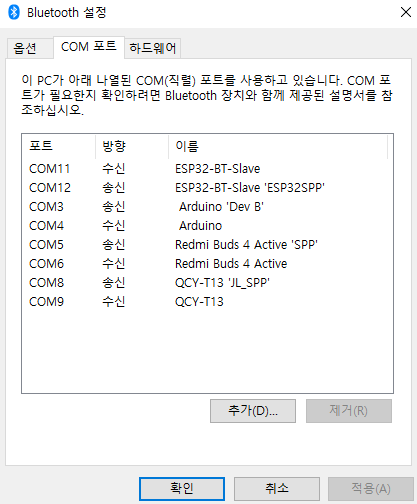
추가 블루투스 옵션에 들어가서
컴포트 확인해보면 COM12가 송신으로 되어있음
COM12
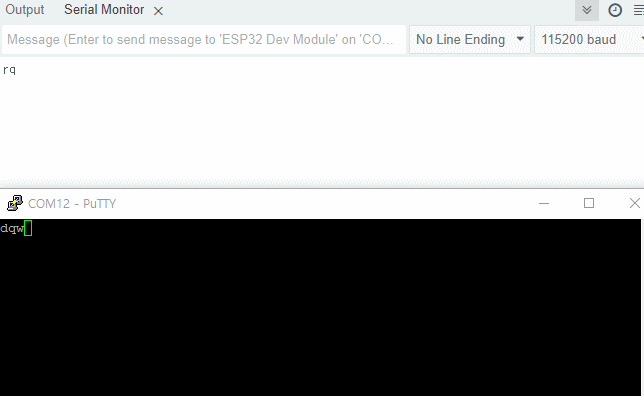
시리얼, 블루투스 둘다 115200으로 열어서
키입력하면 코드넣은대로
상대편에 보내는걸 확인할수 있다.
'컴퓨터과학 > 언리얼' 카테고리의 다른 글
| 관성모션 - 14. ESP32 MPU6050 여러 개 YPR 블루투스로 가져오기 (0) | 2024.02.29 |
|---|---|
| 관성모션 - 13. ESP32 블루투스 + MPU6050 YPR + 보조 베터리 (0) | 2024.02.28 |
| 관성모션 - 11. MPU6050 여러 개 써보기(MUX 없이) + 인터럽트 상태 살펴보기 (0) | 2024.02.28 |
| 관성모션 - 10. MPU6050 두 개 써보기(I2C 멀티플렉서 없이) (0) | 2024.02.27 |
| 관성모션 - 9. 관성계 오프셋 조정 x, 다른 모델로 가지고 놀기 (0) | 2024.02.25 |